Keyboard Builders' Digest / Advent Calendar
GHOST - message from GEIST
Let's take a sneak peek into the keyboard journey and workflow of GEIST, this year's winner of the Seeed keyboard competition.

Published December 15, 2022

ABOUT GEIST
I guess you could call me a keyboard designer. The emphasis here should be on design, because when it comes to the technical side of things half the time I am not entirely sure what I'm doing. That’s why I'm very grateful to all the smart people who shared their designs online and answered my (somewhat stupid) questions, thus helping me to build my first keyboard.
Based in Germany, I earn my living as an animator (although my film/animation projects came a bit short lately due to the keyboards).
I feel very honored that Tamas asked me to submit an article here, among such famous people from the keyboard scene.
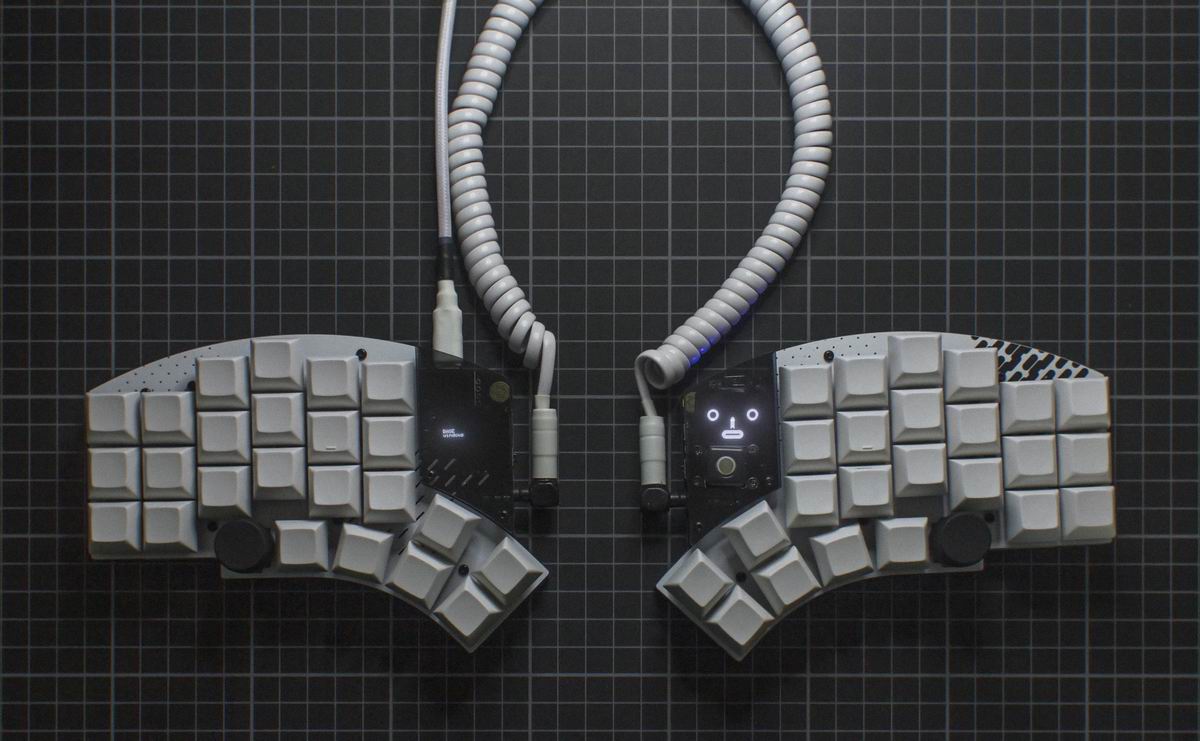
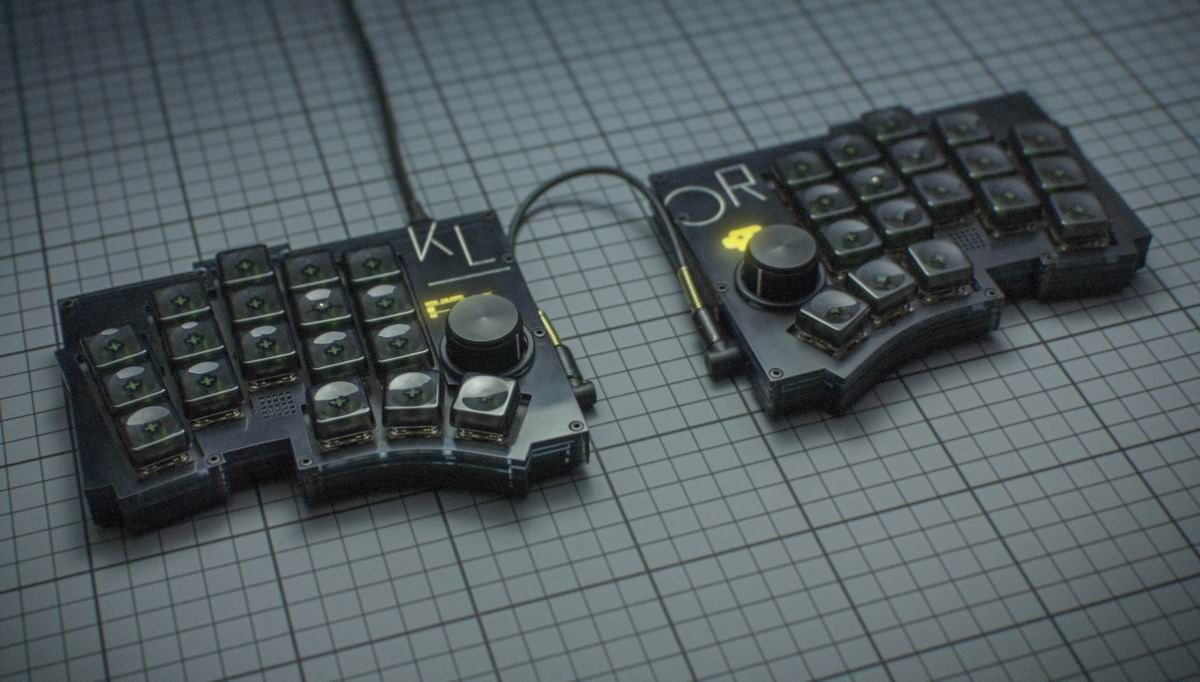
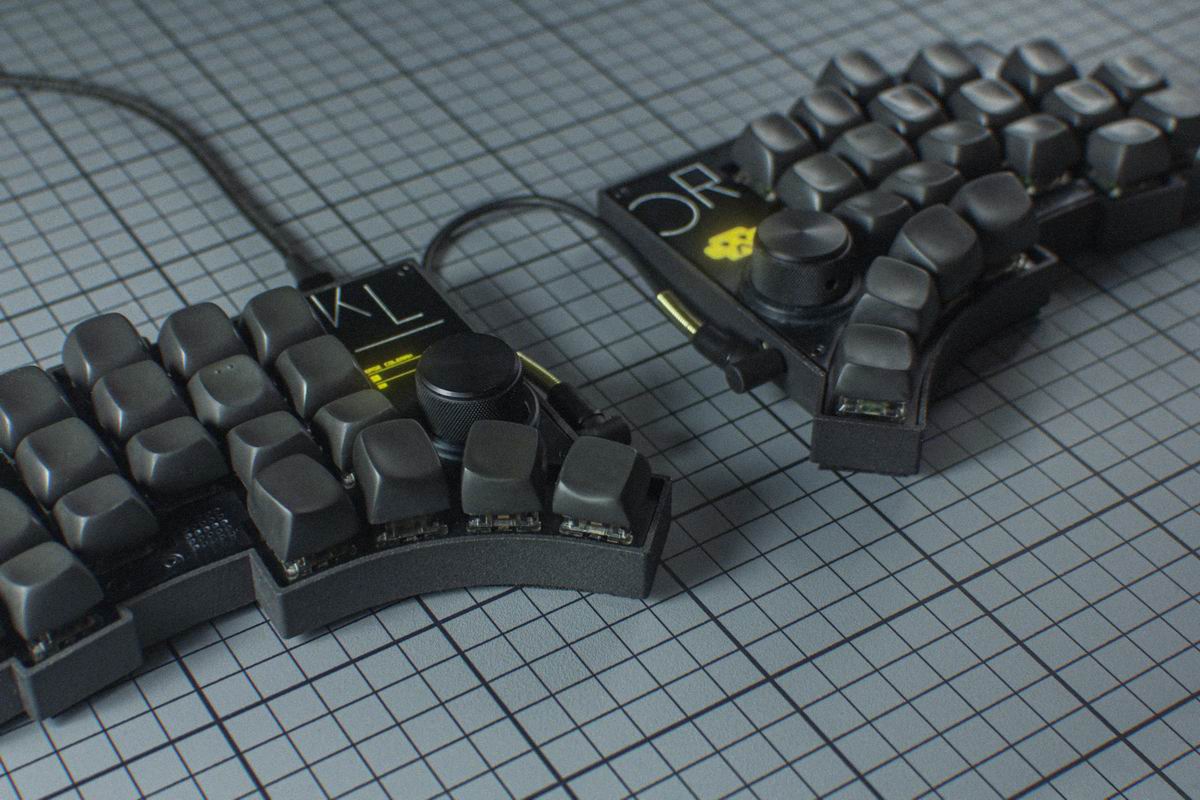
KLOR
WHY
I was actually quite happy with my SplitKB Kyria, but since I use the encoder a lot and didn't want to wait any longer for the Elora [ed.: Kyria Plus with number row], I did some thinking about what my ideal keyboard would look like.
- It could be stripped off of the additional row of thumb keys, as I rarely use them.
- It should allow to access the encoder without moving the hand from the board.
- It would ideally include an OLED cover in the case (I’m a sucker for hidden displays).
- It would contain as much of the QMK hardware shenanigans as possible, as I love using them.
LAYOUT
One evening I played around with some plasticine and some switches, with no real intention of designing my own keyboard.

I noticed how nice some splay feels and searched for a board which actually has some splay.
The Yacc46 by 1m38 already ticked a lot of boxes for me, but not all. So I somehow tried a combination of my plasticine prototype, the Yacc46, the Elephant42 by illness072 (such a beautiful board!) and of course the Kyria.
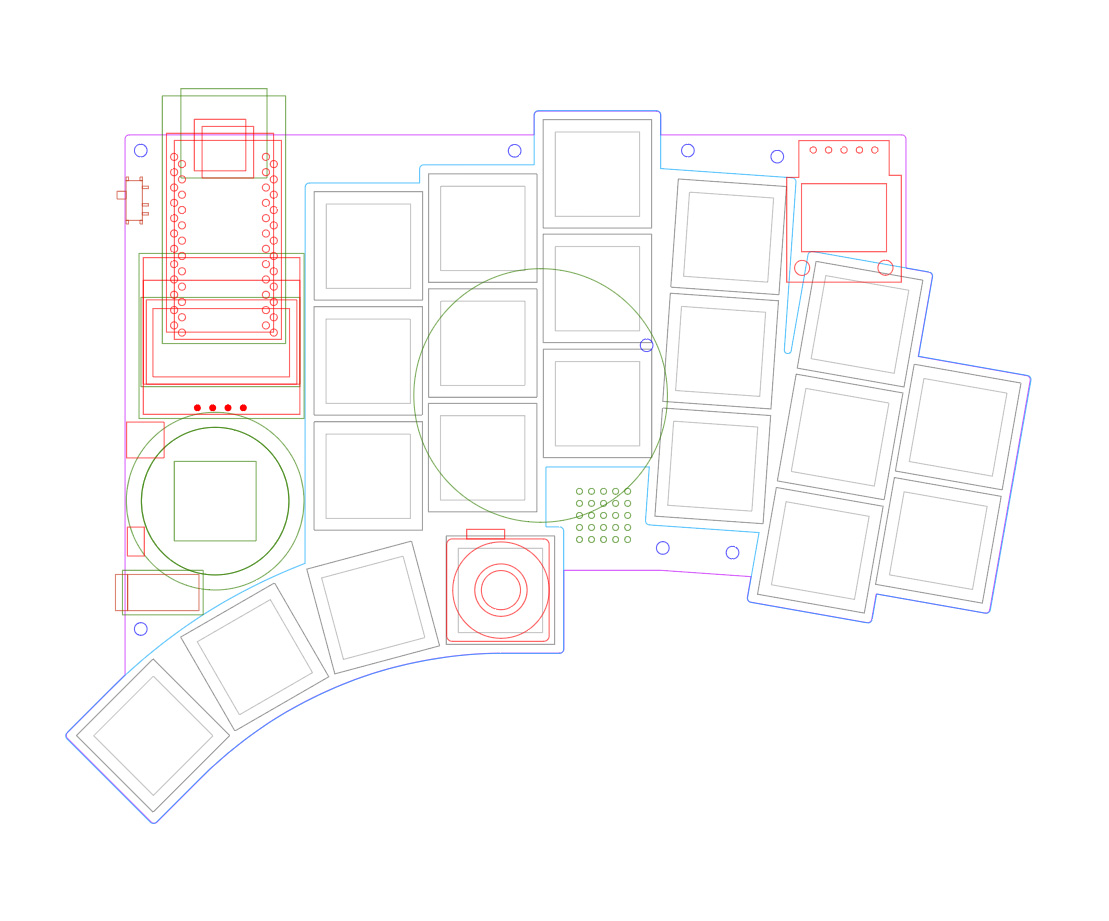
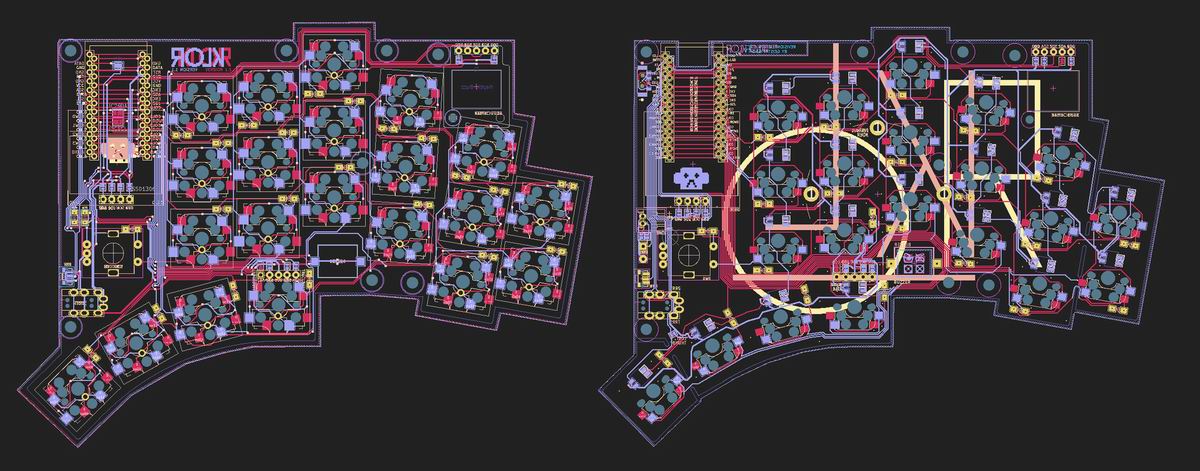
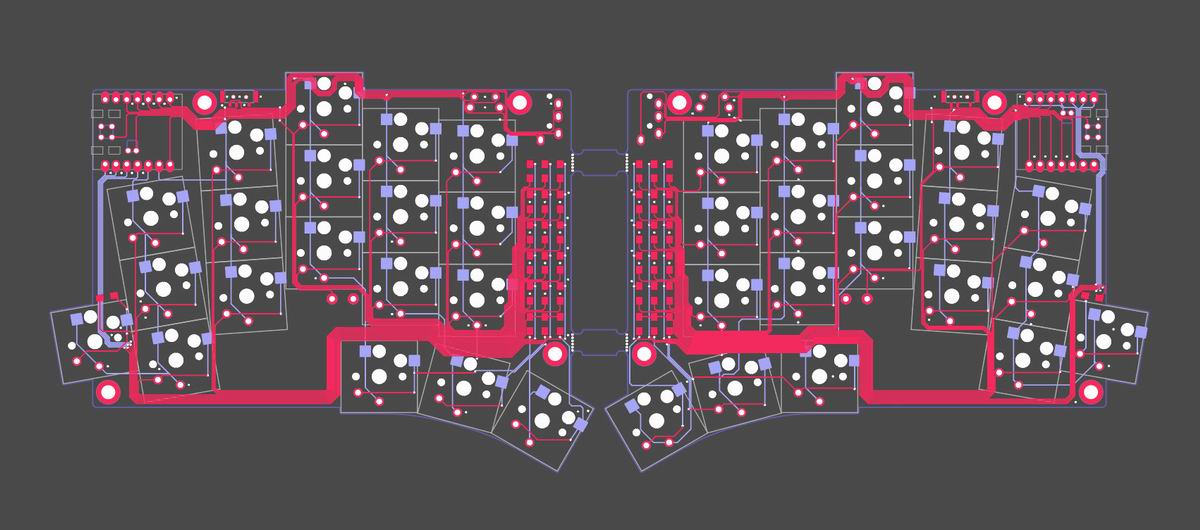
PCB
While still pretending I was just fiddling around a bit and not actually building a keyboard, I asked MangoIV how best to start learning KiCad. He mentioned the excellent tutorial from ai03. So I made this macropad PCB which probably half the keyboard designers have made at some point and started looking at open-source PCBs.
In the meantime I played with Ergogen to solidify the layout which I felt comfortable with and began experimenting with these components in Adobe Illustrator to develop the overall shape of the board ( – I always had a thing for blocky rectangular boards).
My first version was a blatant copy of the Sofle schematics, with some additional features and a few dropped keys (and it kind of still is).
Unfortunately I only discovered the Design Rules Checker two days after already ordering the PCBs. So I ended up with a bunch of PCBs with an unconnected pad.
So I fixed the errors, rerouted everything (it was a mess) and ordered the next revision.
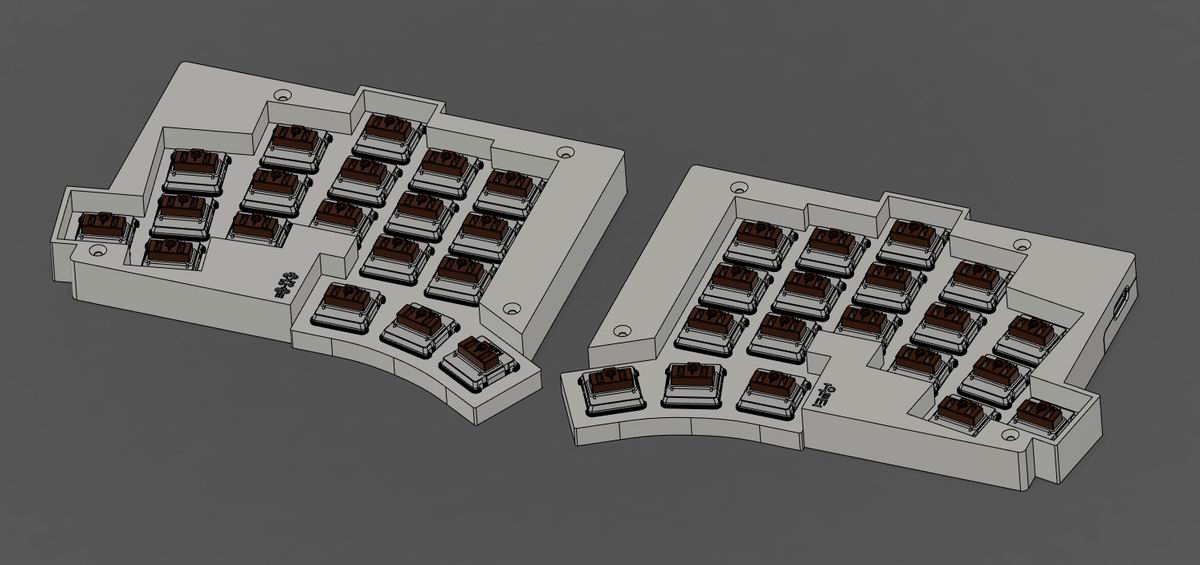
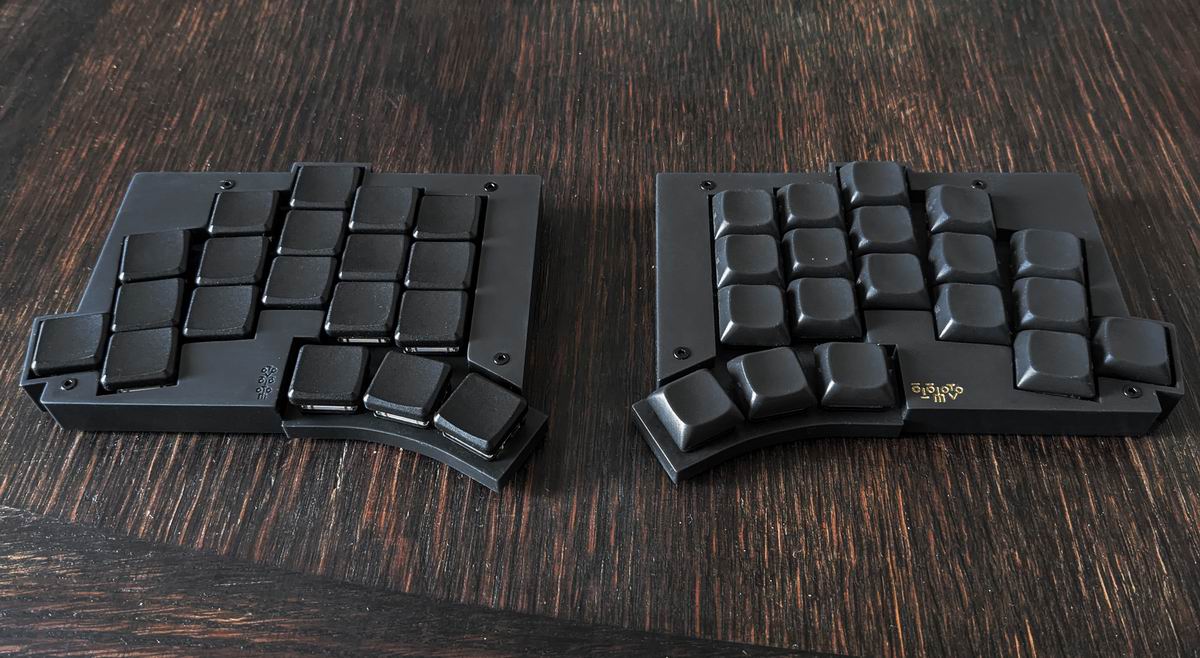
CASE 1
I still used my Illustrator file as the base for creating things like the switchplate, the acrylic on top and the case. So it was a constant back and forth between KiCad and Illustrator (which doesn't necessarily make things easier).
I've ordered the switchplates in aluminium and spraypainted them black. The case was designed in Blender (‘cause I already knew Blender and didn't like the idea of learning a whole new software, something that can certainly be called a mistake).
I wasn't too lazy, but it takes some time to learn Fusion. And I have other stuff to do too!
While I was mostly pretty happy with the first (now fully working) revision, I wanted to go the full route and add per-key RGB.
And since some people also asked for bluetooth and "SplitKB puck" support, I've added those as well. Moreover I made one of the thumbs and the outer pinkie row removable. So I routed it again (actually two times).
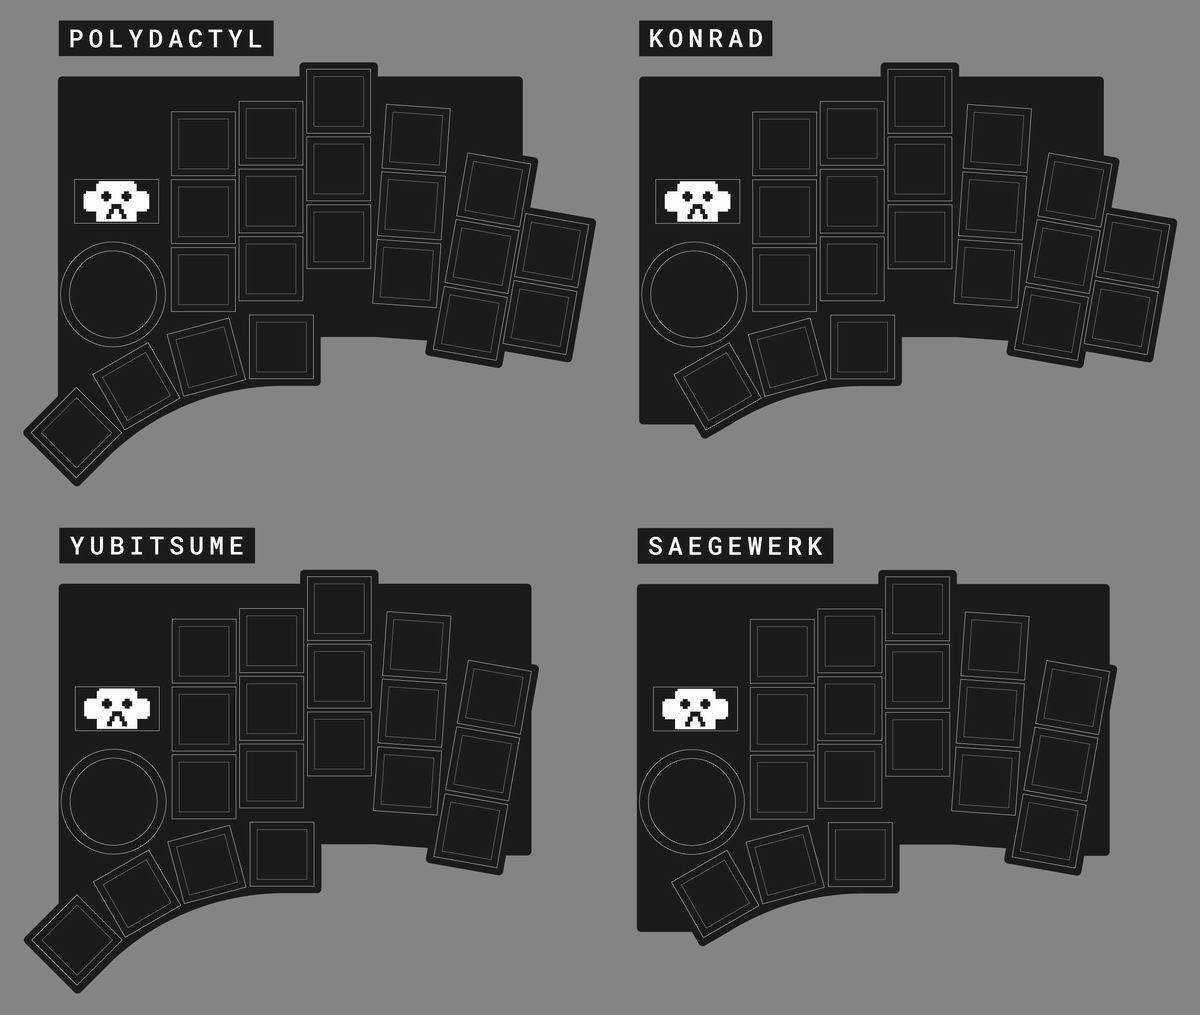
By the way: the layouts are named after the fingers which get cut off.
- Polydactyly is an anomaly in humans and animals resulting in supernumerary fingers and/or toes.
- Konrad is the name of a little boy, in a gruesome German children's book called "Struwwelpeter"("shock-headed Peter"), who is warned by his mother not to suck his thumbs. However, when he ignores her words, a roving tailor appears and cuts off his thumbs with giant scissors. (My grandmother read this story to me many times, when I was a little child.)
- Yubitsume is a Japanese ritual to atone for offenses to another, a way to be punished or to show sincere apology and remorse to another, by means of amputating portions of one's own little finger. In modern times, it is primarily performed by the yakuza.
- Saegewerk means Sawmill. Referring to an old German joke according to which employees of a sawmill can only ever order three beers with a gesture because they only have so many fingers left.
- It shouldn't add additional switch height and minimal width to the board, allowing it to maintain the overall shape.
- the height around the alpha keys should be pretty much flush with the case, to make it look like one unit.
- the thumb keys should still be easy to reach (often a problem with high cases)
- the edge between top and bottom should be hidden as much as possible, while still easy to handle (inserting the board, with its components)
- it should work in transparent resin (something I wanted to try for a while).
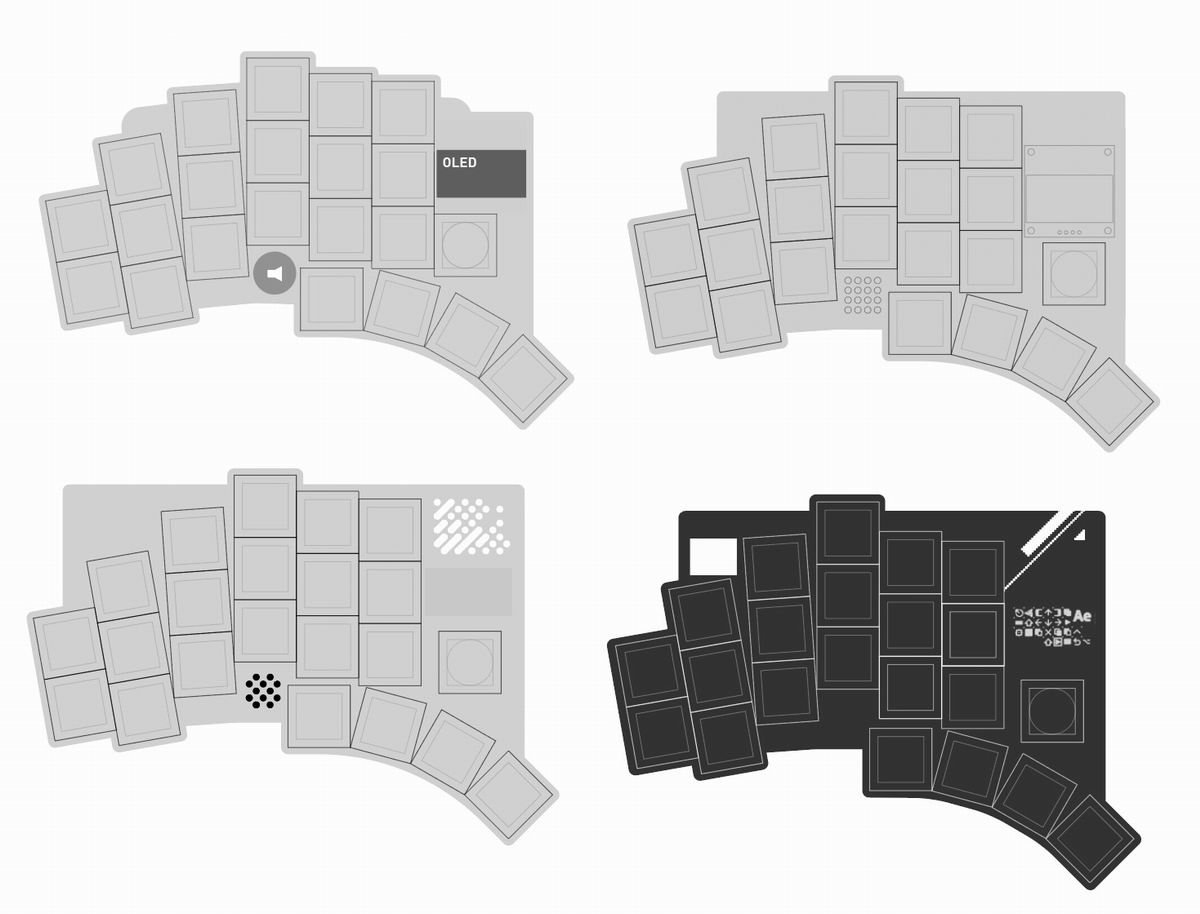
To support all different versions (with/without BLE/Puck and all four layouts) I needed to create 16 different case variations, both for the left and right sides, which adds up to 32 cases (not my smartest decision). Blender's geometry nodes where a huge help in accomplishing this.

To make it even more complicated to change something, I've added a stacked acrylic case for all variants ‘cause I thought it would be cheaper to produce (it isn't).
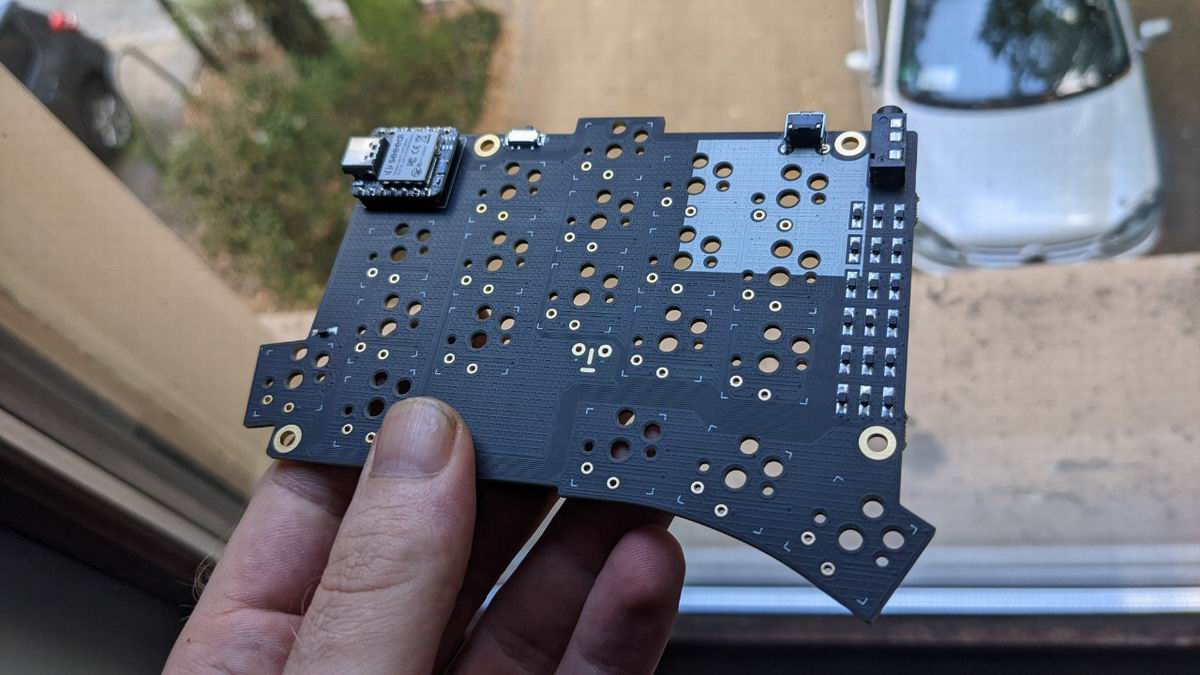
FIRMWARE
The ZMK config and the AVR version of the QMK config were kind of straightforward (‘cause I was able to copy and modify most of it from other boards). The RP2040 config on the other hand was another beast, as RP2040 was not fully supported at that point, but at the same time it was necessary to enable all features of this board. Thankfully KarlK90 (who brought RP2040 support to QMK) is an incredibly patient guy, who helped me SO MUCH with getting everything running. If it wasn’t for his help, I really wouldn't have stood a chance to make everything work.
RELEASE
I really didn't expect to get more than some upvotes on Reddit and a handful of people building it, but I soon saw pictures of my keyboard design, lying on a desk on the other side of the world. It's really kind of a strange feeling – but in a somewhat nice way. A few months later I saw so even more great keyboards taking my initial design as a base which was sooo nice to see.
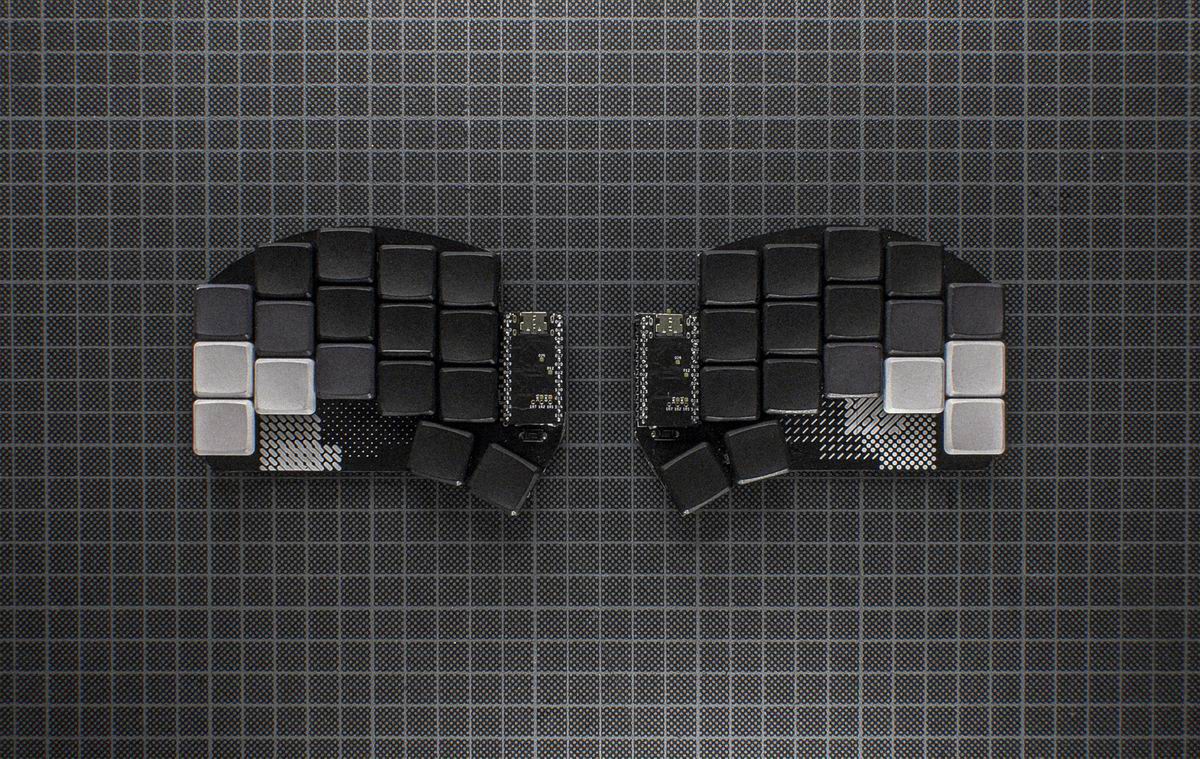
KLOTZ
WHY
Fired up by the power of being able to make my own keyboards, I started designing a choc board even before having finished the KLOR. Add this adds to the list of my not-so-great ideas.
It should replace my Choc Sweep as a travel keyboard.
LAYOUT
The idea was to add some splay, an encoder and some status LEDs (for displaying battery status, layers etc.) to the Sweep.
I kept the two thumb keys, mainly ‘cause it should still fit on the back of my Wacom Mobile Studio Pro, as a travel macropad, for using shortcuts, when animating.

(some 3M dual lock velcro on both sides to attach it without any wiggle room).
PCB
I really liked the look of David Philip Barr's (aka Broom) Cradio. But I thought maybe I can make it even blockier while still keeping it fairly small. The only way to do so seemed to be making some keys break out the rectangular shape of the board. With the outer contour I tried to emphasize this effect even more.
The actual PCB was done pretty fast – after doing the KLOR. (Is it just me or is routing a keyboard PCB kind of calming?)
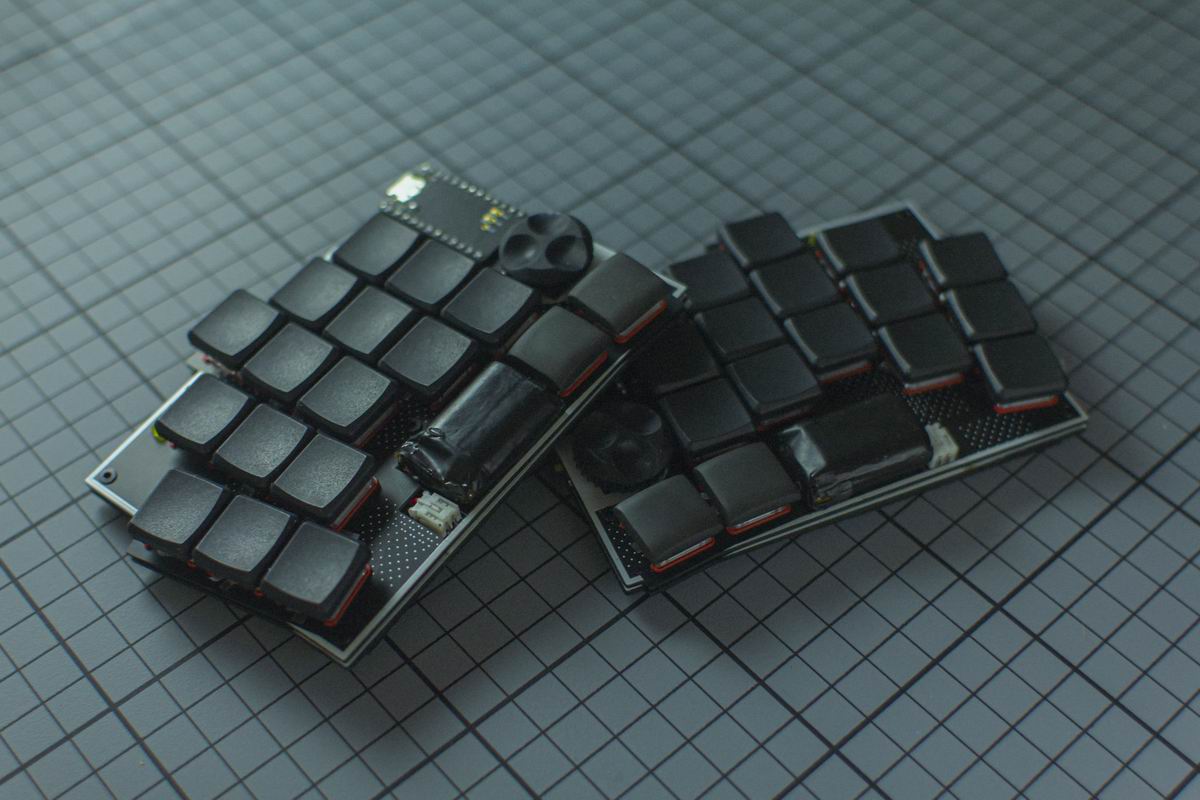
By the way: KLOTZ is the German word for chunk and it refers to the rectangular shape and the beefy battery I put in there.
KNOB
Unfortunately, there are not many knobs for the EC12 encoder, so I tried to make my own in Blender. Some really nice people printed them for me, so I could iterate it further.

A few iterations later I ended up with a knob I was pretty happy with. It took me a few weeks to notice its resemblance to the knob yfuku did for the claw44.
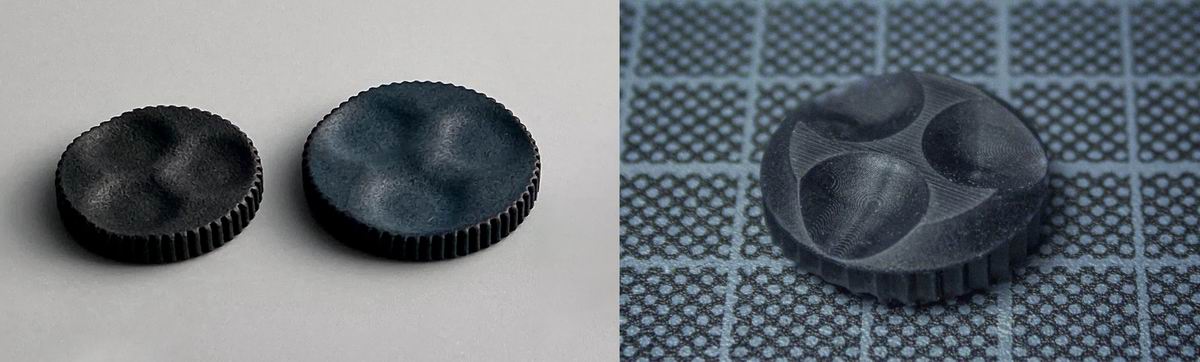
Wait! I didn't steal his idea. At least not on a conscious level!
Sorry, the acoustics in here are really bad, I can't understand a single word you say.
FIRMWARE
The firmware wasn't too complicated after doing the firmware for the KLOR. The only problem was that controlling single through-hole LEDs wasn't as easy as I expected it to be (still haven’t figured out how to do it).
I'm actually pretty happy how everything (except of the LEDs) turned out and use the KLOTZ quite often. And while splay feels already nice on MX keyboards, it feels amazing on choc spaced boards.
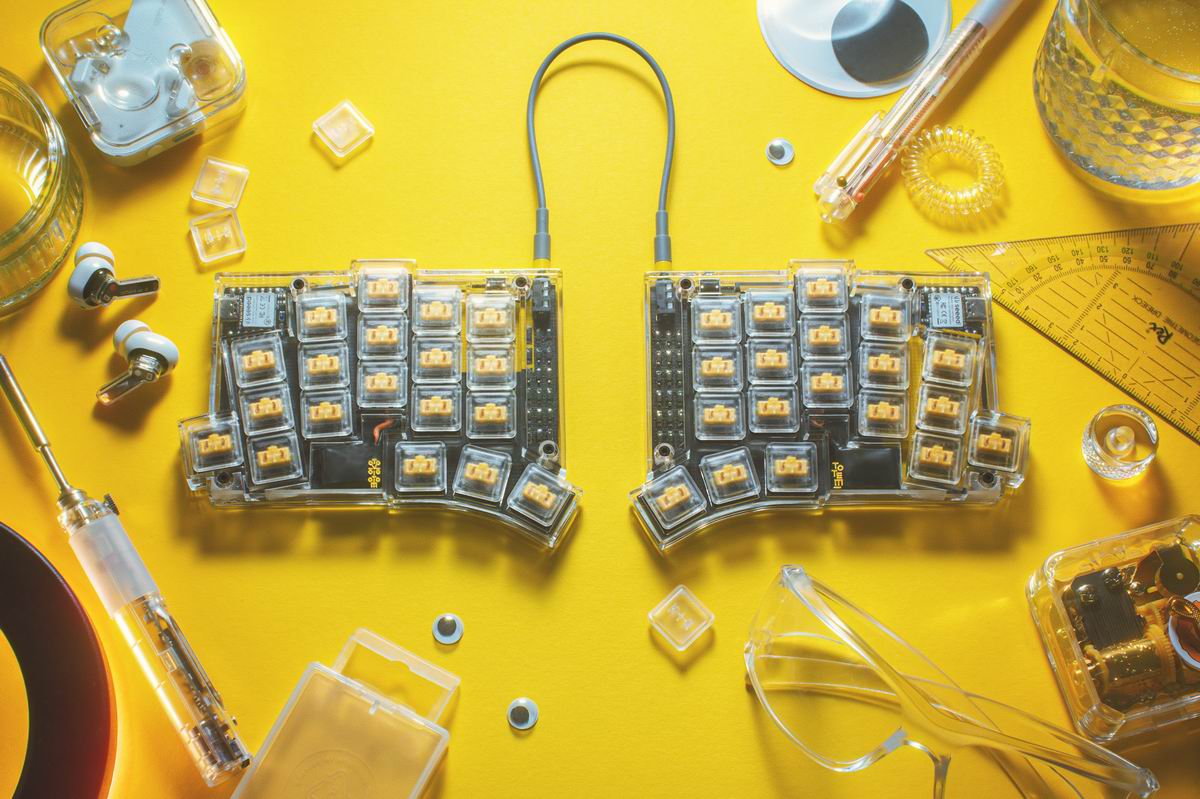
TOTEM
WHY
I read about the Seeed Fusion DIY XIAO Mechanical Keyboard contest (what a name) and thought this could be a nice opportunity to try out some ideas I had floating in my head (such as a transparent case). And who would say no to free assembled PCBs?
Psssh!
LAYOUT
Since the XIAO doesn't have a lot of pins, I thought I should focus on a nice layout instead of jamming a lot of hardware features in it. The base was nearly identical to the KLOTZ, I just added a bigger thumb cluster to it.
While fiddling around with it in Illustrator, I thought it looked kind of boring, and I remembered that I wanted to try the layout that the Balbuzard by Tom Brow and the Osprette/Clog by Sam Mohr use, where the top outer pinky keys are placed outside, making them easier to reach.
The addition of the extra pinkies and the resulting change in shape also allowed me to place the XIAO better.
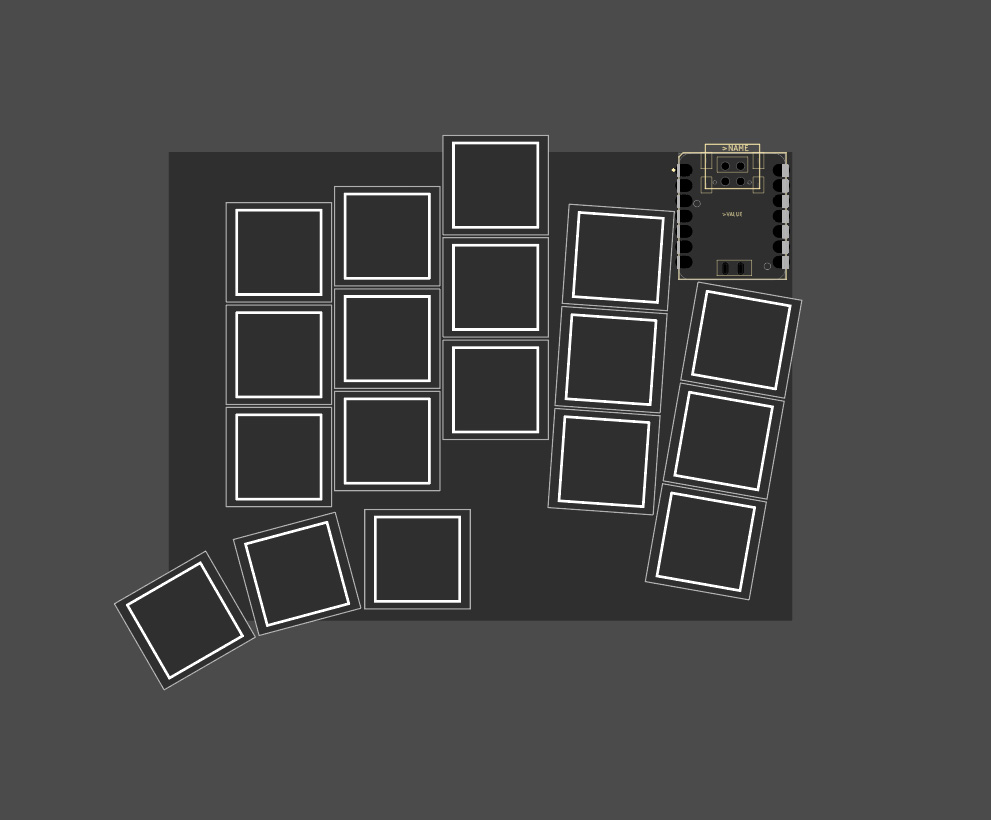
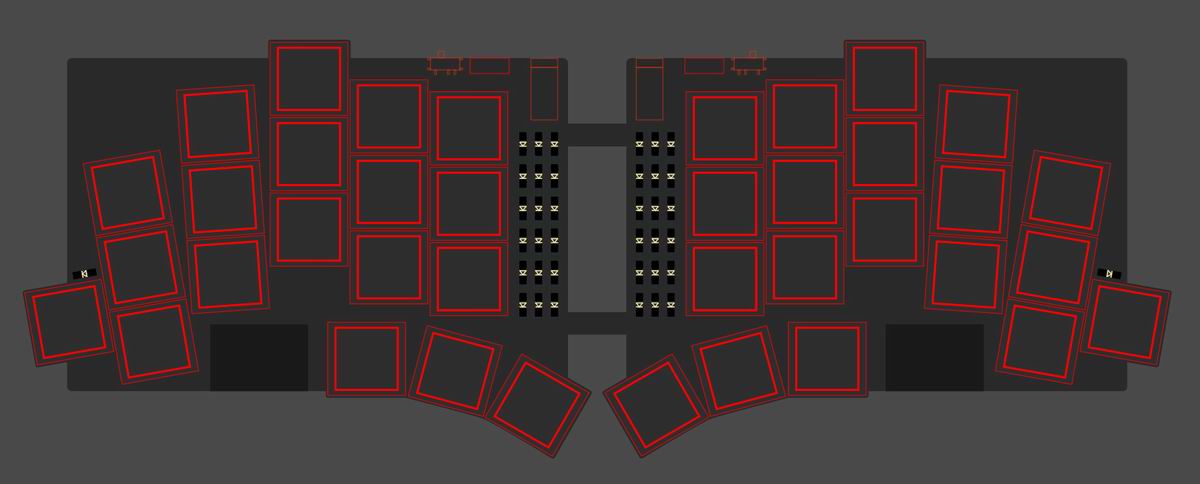
Since at that time I had already decided to have a transparent case printed for this board, I thought I could try to make a diode cluster, ‘cause it would probably look nice.
PCB
Again it was my usual back and forth between Illustrator and KiCad, till I had everything in place and routed.
If you haven't already known or guessed: routing a diode cluster isn't that much fun.
I tried to route the traces pretty close to the edge, to keep some copper free areas allowing me to add copper graphics. I chose the name cause the diode cluster kinda looks like a totem and cause I like the sound of the word. The logo should resemble a totem pole. I tried to put it together from the letters of the name and ended up with the most obvious choice: bird, human, Cthulhu. The three pillars of life.

Unfortunately, the first set of PCBs had a major flaw: Since I tried to use the same groundplane for both halves, I ended up with some parts not connected to it. Also I chose the wrong footprint from Crides excellent kleeb collection (which is an absolutely necessary collection if you want to use the XIAOs in one of your boards).
Yea! I know that! But mistakes happen, especially if you're in a hurry to meet a contest deadline.
At this point I definitely think you should leave.
Where was I? Yes, so I ordered a second set of PCBs. This time from AllPCB, cause I liked the idea of a matte black PCB with yellow silkscreen, which in the end came out even better than expected.

CASE
Things I tried to consider for the case:
Since I'd never worked with any CAD application, I watched some tutorials and then started right away, by exporting a STEP file from the KiCad PCB and bringing this into Fusion360. Everything ended up kinda messy, but I still ordered the case, which fitted surprisingly well. At least on most sections of the board.
The spacing on the reset switch was too tight to get the PCB with the components in there without a lot of wiggling around.
Is this a fake mustache?
Oh, I'm really sorry, you reminded me of someone else.
Since my Fusion file was already a real mess, I started all over. This time I assigned the 3D models to the PCB in KiCad and exported a proper STEP file, to use it in Fusion. I also watched a lot more tutorials on how to do this.
The new prototypes I've ordered from JLC fitted better than expected so I ordered the clear resin version from PCBway.
The clear resin from PCBway looked amazing and fitted pretty well.
RELEASE
I took some pictures with random transparent stuff I found in my flat and edited the shit out of them (I'm just a mediocre photographer, but I have a lot of fun editing pictures, to make them look decent).
CONTEST
In the end I actually won the contest, something which I honestly had not expected. Especially not after having seen the boards of all the other competitors. Some of them, like for example the GRIN Quern by policium or the beyblock20 made by Chris Lo are way above my skill level.
I should ignore you from now on.
FUTURE PROJECTS
Maintaining and improving things along the way always takes a lot of time, but I have two projects in mind that I would like to realize soon:
KLYDE
I noticed that a lot of people have built a stripped down version of the KLOR without a case and all the hardware features. So I want to facilitate this with a lite version that is optimized for this purpose.
UNIBODY BOARD
My next bigger project will be a unibody board, with onboard RP2040, if the really nice people of the Absolem Club and the German keyboard discord are still willing to help me find solutions for my stupid ideas.

| GEIST (37)GEIST |
|---|---|
| Location | Offenbach, Germany |
| Description | DIY keyboard designer/paranormal phenomenon/friend |
| Occupation | animator, illustrator |
| Joined | 2016 (took a break between 2017 and late 2019) |
| Niche | column staggered ergo keyboards |
| Fav. switch | Keebwerk Tacits (MX), Lowprokb Sunsets (Choc) |
| Fav. profile | DES, MT3, PBS (MX), LDSA, DCJS (Choc) |
| Other hobbies | animation |
| Links | https://github.com/GEIGEIGEIST, https://twitter.com/GEIGEIGEIST, https://www.reddit.com/user/_GEIST_ |
Published on Thu 15th Dec 2022. Featured in KBD #107.
Related

Lio46 V2
Lio46 is a wireless, 46-key split keyboard – designed by Liolaeus.
K02 - Sweeping the Sweep
A redesign of the Sweep: K02 by Lu Immich.
Modubu
Yuburoll's modubu is a semi-staggered 38-key split keyboard – made for Korean layout.
Kinesis Essential rebuild with Bluetooth
This Kinesis Essential has been turned into wireless by sczizzo. Lot's of useful info in the thread.