Keyboard Builders' Digest / Projects
1800-ish wooden ortho
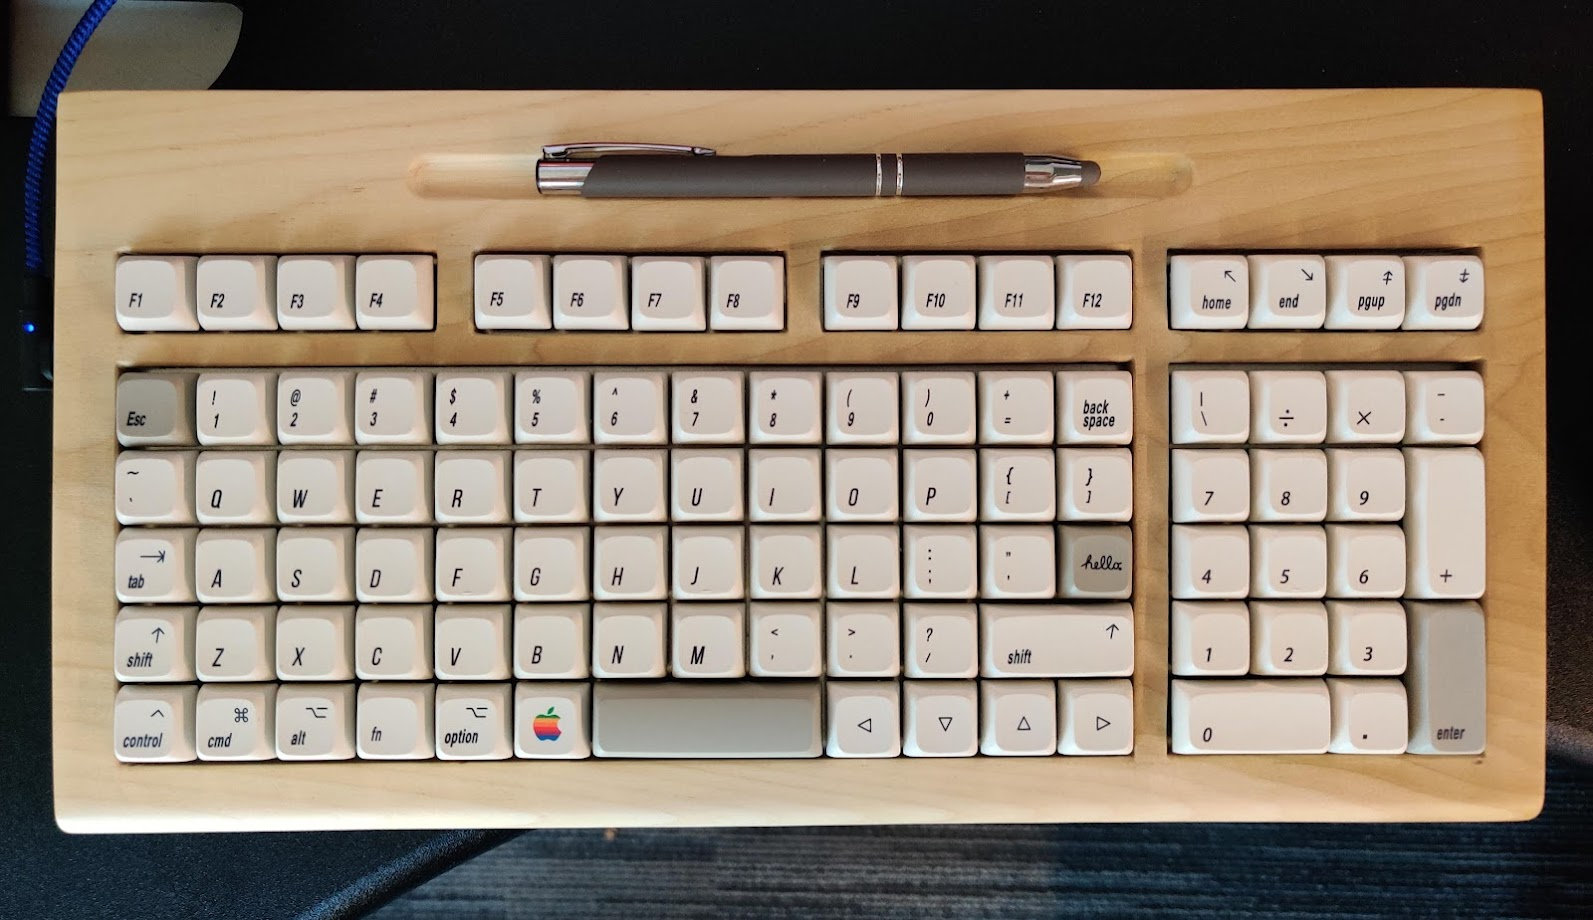
An 1800-style ortho board by u/MetaWhirledPeas, hand made from a solid piece of poplar from Home Depot.

Published April 16, 2022
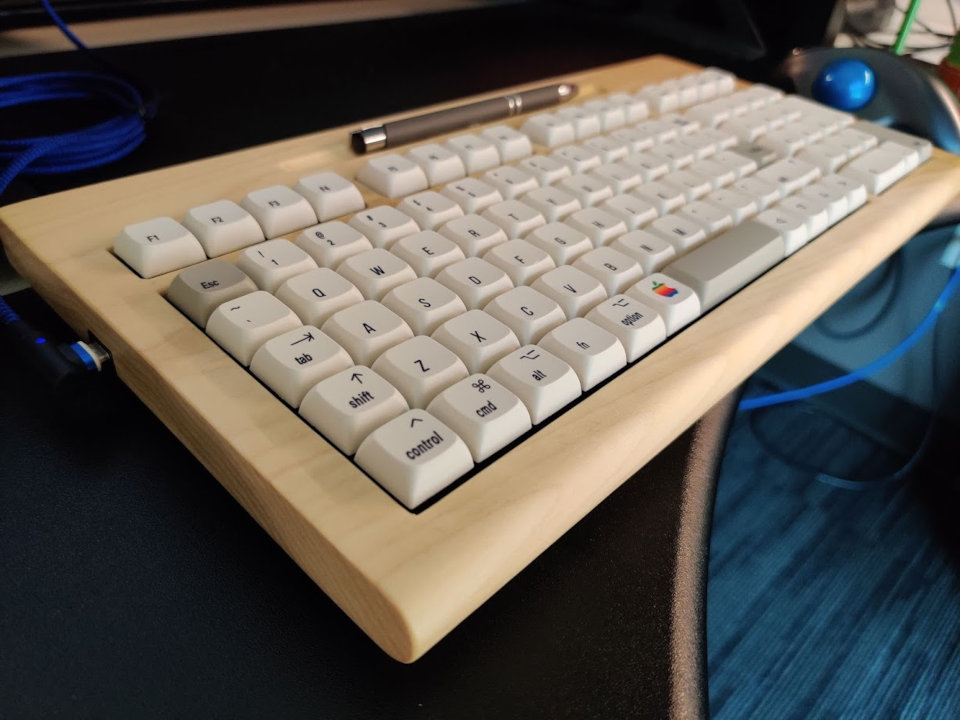
Many of you are familiar with the classic 1800 layout (the inverted T arrow cluster crammed between the alphas and numpad), however, I wasn't sure how an ortholinear 1800 looks like. Nevertheless, MetaWhirledPeas called his board an 1800 ortho, and who am I to disagree?
I've been an avid ortho 40% user for a while now, but I wanted to explore some new form factors – MetaWhirledPeas.
This ortho 1800 (gallery) addresses two concerns:
- It provides discrete keys for most actions, for when layers are not desired (pressing a mission-critical function key, for instance)
- It provides a bridge between the ortho 40% and staggered full-size worlds.
It would hypothetically be a good choice for someone wanting to dabble with ortho form factors but not wanting to commit to going crazy with layers. There are only a handful of keys hidden behind layers (function+shift to engage caps lock, for instance).
The author still has all the layer bindings available for use as an ortho 40% board, and he continues to use them a lot. But there are times when he just wants to reach over and use the numpad (data entry, for instance) and "it's nice to do that without fuss".
One of the biggest challenges with this form factor was the keycaps:
I wanted properly labeled keys, so choice was severely limited. I was happy to find this Apple homage set on Amazon with plenty of oddball keys including a 3u spacebar. Domikey sets also work, with a few minor compromises.
Since I was interested in the actual woodworking process, I reached out to MetaWhirledPeas to ask for more info. He was kind enough to shed some light on his workflow so let's pass the mic to him:
The workflow
"My process was a series of underestimations. Between the woodworking and wiring it was significantly costlier than expected, in terms of both time and money. I learned some lessons and made some compromises, but in the end it was a good, fun experience.
I had the layout defined in KLE for months before starting. I knew keycaps would be a struggle, so I formed the layout around the most flexible SA set I could find, a Domikey WoB set. More recently I found an even more flexible Apple-themed XDA set from Amazon. I bought both sets but I've settled on using the Apples.
I had a pretty good idea of how I wanted to make the board. I knew I wanted to make a high-profile case out of solid wood, paired with a steel plate. I was going to need a hand router (cha-ching) and a litany of smaller woodworking tools that I lacked (cha-ching). After a few weeks (months?) of accumulation time I had enough gear to get started. Before I did any woodworking I used builder.swillkb.com to generate a plate from the KLE layout, then ordered a plate through Send Cut Send.

The original plan for the case was to sandwich two boards together, but I was never able to work out the logistics of it. My only affordable choice for wood was a slab of poplar from Home Depot, which came in predefined widths and thicknesses.
I didn't own a planer, so I wouldn't be able to properly glue two boards together for added thickness. I ended up using the thickest piece of poplar I could find, and used a thin piece of poplar as the bottom cover. Just cutting the board square was a challenge. I used a router bit to do it; maybe there are better ways.
Routing went like this: first I used a roundover bit to create the bull nose on the front of the board. I wasn't sure how this would turn out, so I made sure to do it first before getting too far into the weeds. I then hollowed out the bottom of the board by plunge-cutting with a downward spiral router bit, making the void just big enough to fit the plate.

Then I flipped the board over and plunge-cut the key voids. The router bit is round, so filing all the void corners was necessary. At this point I used glued wood strips to hold the plate in place, then all that was left was the bottom cover.
Eventually I got it all put together, at which point I used a hemispherical router bit to cut the pen groove, and did one final (nerve-wracking) cut for the USB port. All that was left after that was a little bit of sanding and finishing. I used about a dozen coats of polyurethane finish from a spray can, smoothed over with some 3M abrasive pads.
 glued wood strips securing the plate")
The wiring was a pain. Just slow and tedious. I was advised hand-wiring would be easier than a custom PCB but I'm not so sure. Maybe one day I'll find out what PCB creation is like. When I neared the end of the wiring process I realized my Pro Micro didn't have enough pins to support my layout, so I had to order an Elite-C from Keebio to replace it. All of this baaarely fit within the enclosure, but it did fit!"
Mistakes
Most-used equipment
Published on Sat 16th Apr 2022. Featured in KBD #74.
Related

Operating wooden keyswitch
The artisan keyswitch by BitchassSixtyNine in action.
PCB 68 keyboard
A bluetooth PCB via SuperMini in a wooden case: PCB 68 keyboard by alan0ford.
Apple Ergo Mech Keyboard
Apple ergo split mechanical keyboard? No, not that Apple. JMAWWorks carved this beautiful case out of curly apple wood.
Wooden Alps keyboard
A wooden keyboard by u/the5andmany with Alps switches and hand-filed switch plate.